Aztec Connect Sunset
Aztec Connect is no longer being actively developed.
The rollup instance operated by Aztec stopped accepting deposits on March 21st, 2023. Read the full announcement here.
We will continue to process transactions and withdrawals for funds that are already in the rollup until March 31st, 2024, at which point we will stop running the sequencer. Users should withdraw funds immediately. See the zk.money section below for details on how to withdraw funds.
Run your own AC
All of the infrastructure and associated code required to run and interact with the Aztec Connect rollup is open source, so anyone can publish blocks after we stop, or run their own instance of the rollup software.
You can find the old documentation site that includes all of the pertinent information on the aztec-connect branch of the docs repository.
The code has been open sourced and you can find the relevant repositories linked below.
Source Code
Follow the links for more information about each package.
Zk.money
Exiting Defi Positions
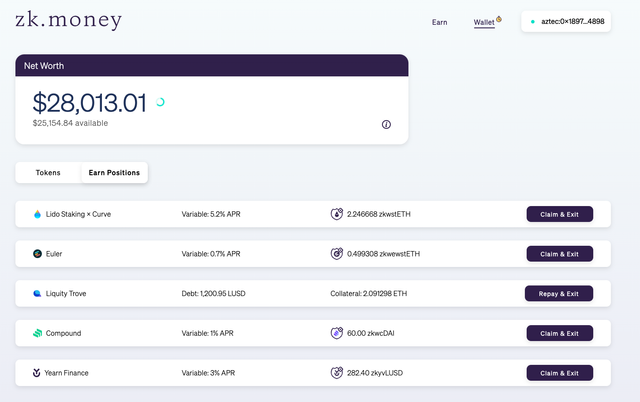
- Navigate to your zk.money homepage and click “Wallet”.
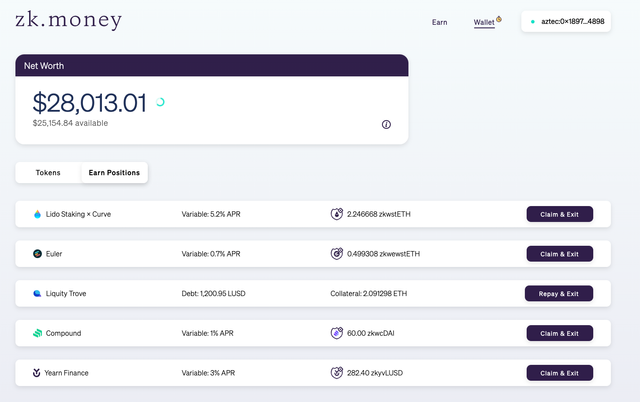
- Scroll down to “Tokens” and “Earn Positions”.
- Click “Earn Positions”.
- Click “Claim & Exit” on the position you wish to exit.
- All exit transactions are free in “Batched Mode” proceed to step 6 to get a free transaction.
- Click “Max” to exit the full amount, and then select a speed for your transaction.
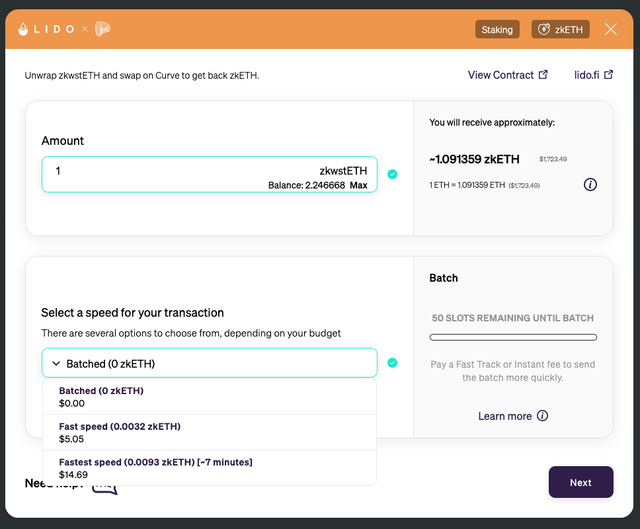
- Once you have done so, click “Next”.
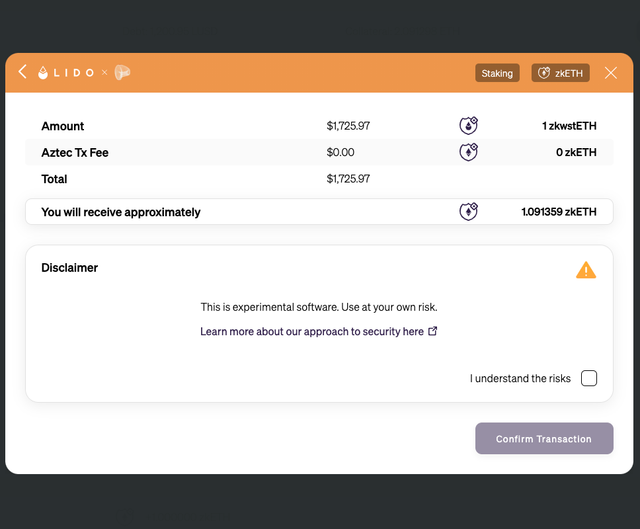
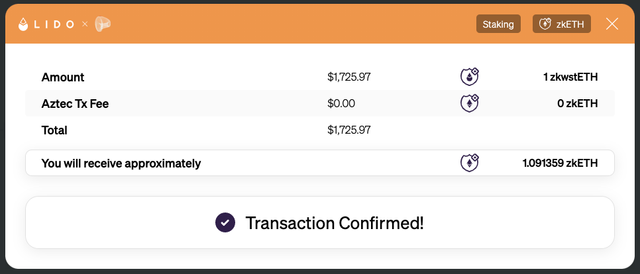
- Review the amount you will receive is correct, tick the disclaimer, and click “Confirm Transaction”.
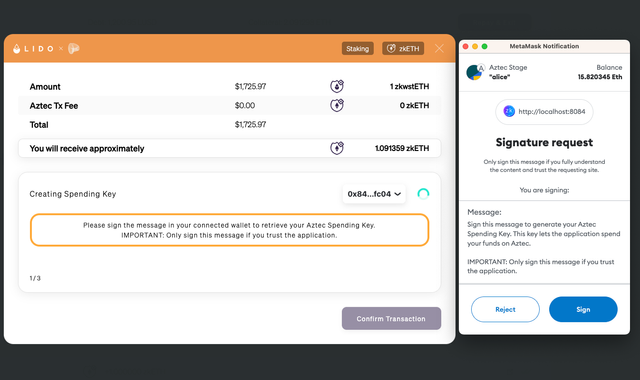
- After clicking confirm transaction, sign the signature request using your connected wallet (e.g. Metamask in this example).
- Wait until your transaction is confirmed.
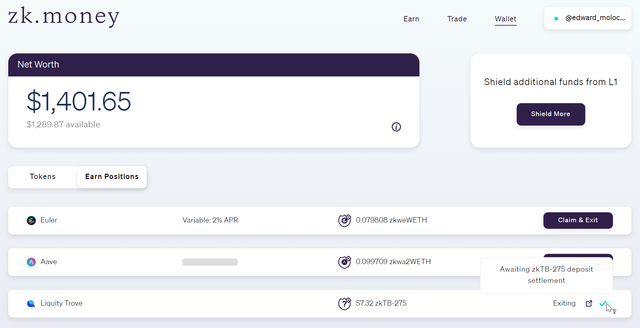
- Navigate back to your wallet homepage and click “Earn Positions”.
- The status of your exit will be displayed here, as shown by “Exiting” (1 tick).
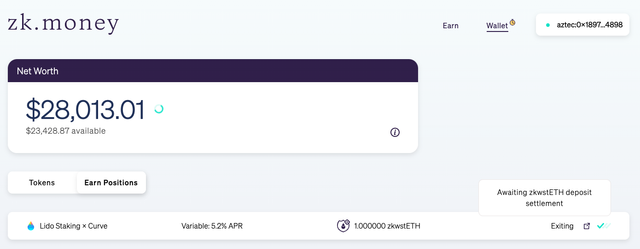
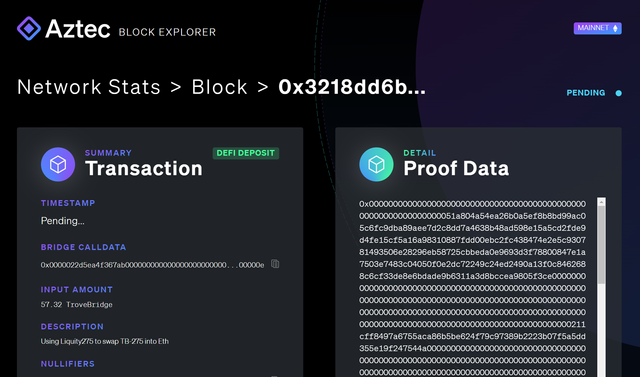
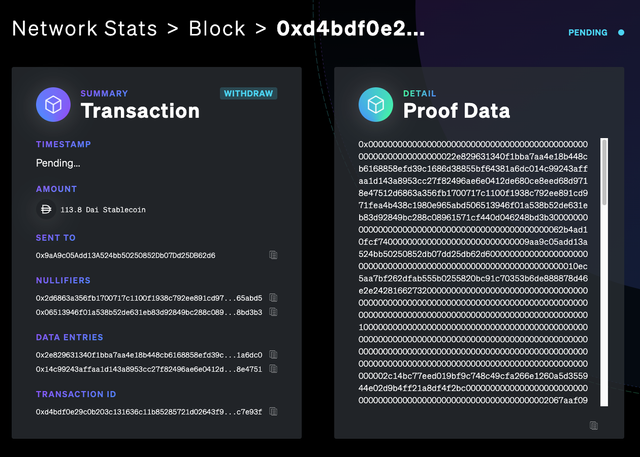
- To the left, click the transaction hash icon to be taken to the block explorer page to see the transaction status.
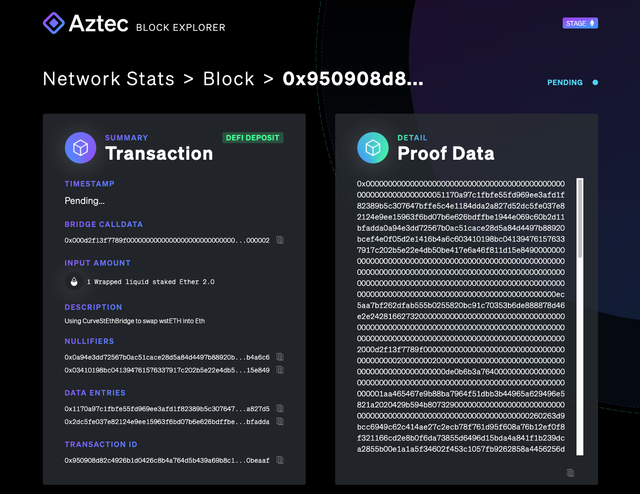
- Your funds will appear in your dashboard once the transaction has settled.
Exiting LUSD Borrowing
Your LUSD debt is repaid using a flash loan. Part of your ETH collateral then repays the flash loan, and the remaining ETH is returned to your account. Your total TB-275 tokens represents the entirety of your share of the collateral. Spending all your TB-275 will release your entire share of the collateral (minus the market value of the debt to be repaid).
Liquity: https://docs.liquity.org/
- Navigate to your zk.money homepage and click “Wallet”.
- Scroll down to “Tokens” and “Earn Positions”.
- Click “Earn Positions”.
- On your Liquity Trove position, click “Repay & Exit”.
- Click “Max” to exit the full amount, then select a speed for your transaction.
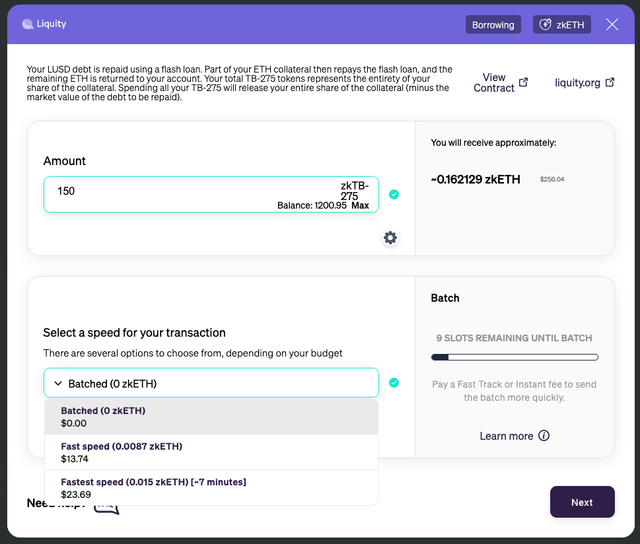
- Once you have done so, click “Next”.
- Review the amount you will receive is correct, tick the disclaimer, and click “Confirm Transaction”.
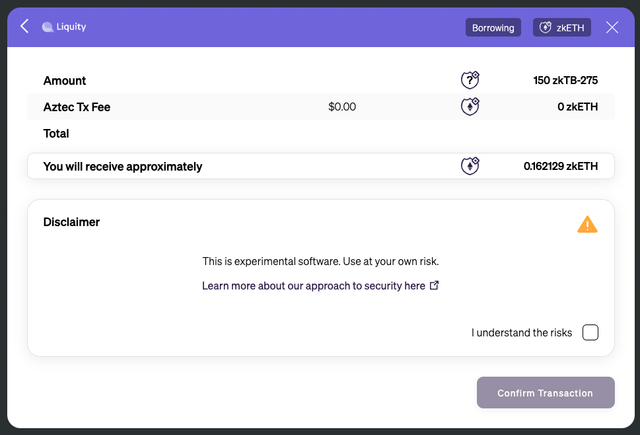
- After clicking confirm transaction, sign the signature request using your connected wallet (e.g. Metamask).
- Wait until your transaction is confirmed.
- Navigate to your zk.money wallet homepage and click “Earn Positions”.
- The status of your exit will be displayed here, as shown by “Exiting” (1 tick).
- Click the transaction hash icon to be taken to the block explorer page to see the transaction status.
- Your funds will appear in your dashboard once the transaction has settled.
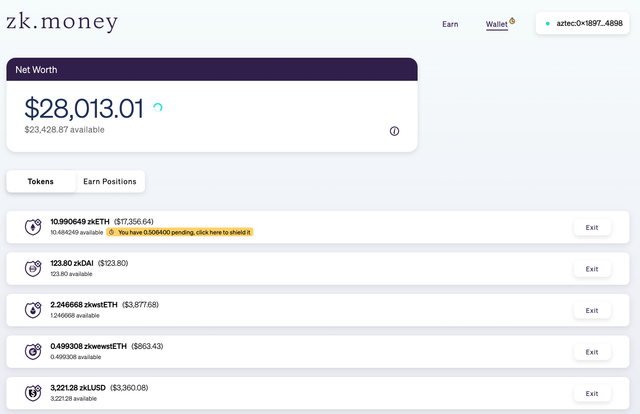
Withdrawing Assets
How to withdraw ETH, DAI and LUSD.
- Navigate to your zk.money homepage and click “Wallet”.
- Scroll down to “Tokens” and “Earn Positions”.
- Click “Tokens”.
- Click “Exit” on the desired token you would like to withdraw.
- Click “Withdraw to L1”.
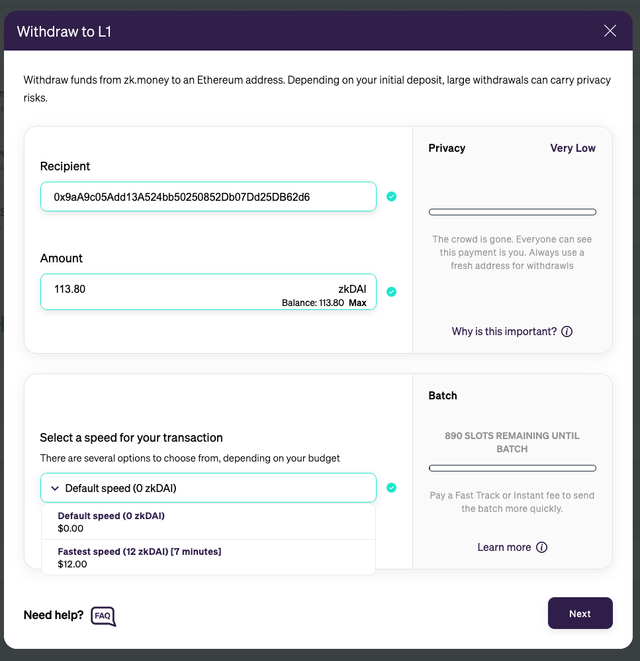
- Enter your recipient address.
- Click “Max” to withdraw the full amount.
- Select a speed for your transaction (transactions are free in “Batched Mode”).
- Click “Next”.
- Review the amount you are withdrawing is correct, tick the disclaimer, and click “Confirm Transaction”.
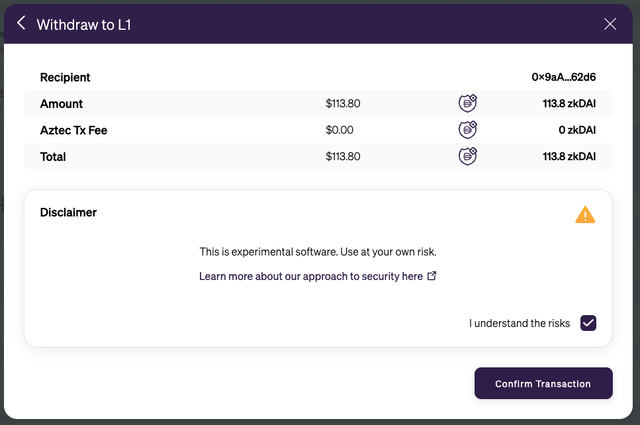
- Sign the signature request using your connected wallet (e.g. Metamask).
- Wait until your transaction is confirmed.
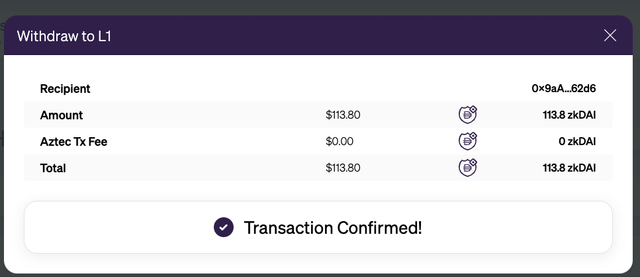
- Navigate back to your wallet homepage, under Transaction History. Click the transaction hash to check the status of your transaction on the block explorer.
- Your funds will appear in your recipient wallet once the transaction has settled.